Pages

Sunday, December 21, 2014

How to fix scratched coating on aluminium

Recently, it fell into my hands a Nokia C5 which was aesthetically brand new, except for some "deterioration" of the back cover. Terrible.


In the pics it doesn't look so bad but in reality it was worse. Even worse if you compared with the rest of the phone, a pitty. The deterioration was only of the transparent coating, not the aluminium itself, fortunately.

Unfortunately, it seemed this cover wasn't very popular and there weren't many fake covers to buy for less money than the original one. This genuine one was 8€ without shipping, so almost half the price I paid for the phone. I had to fix this one.

You might think a good solution for these problems is sanding and re-coating, but it may be a bit aggressive for the first attempt of mending this. So I discover something that was worth a try.

Fixing

What you need to start is a piece of copper to peel off the coating. Copper is less hard than aluminium, which means that there is no way you can scratch aluminium with copper. In Europe, coins of 1, 2 or 5 cents are great for this. So, let's start peeling.


The Nokia brand and model will be intact all the time because they are etched in the aluminium. However, if you have some stupid phone carrier logo there, it will almost surely disappear.

Sometimes you get some brown scratches for the copper. These are easily removed with a rubber eraser.

When you're done, do a hard use of the eraser to clean the surface and to find if it is some coating you missed.


Almost finished. You can stop here if you want, the result is great and shiny. However, if you want to go further and have some car polish around (like this one or similar), it is good to use it.


Of course, it is almost impossible to photograph the difference, but this last photo includes the polishing. This step adds shiner and softer finish.

The end product is impressive. Now it's your turn.

Saturday, September 20, 2014

ERS Transponder

Sometimes you walk everyday through somewhere and one good day you realise there is something interesting just there. My case today...


This is an ERS (European remote sensing satellite) transponder. It was part of the ERS satellites project. ERS satellites were launched in 1991 and 1995 (there were 2 of them) for scientific research purposes, not about the space but about the Earth.

This thing has antennas and with them it captures radio frequencies from the satellites. Then it processes and converts them to signals that computers and other machines in Earth can understand.

Beautiful, isn't it?


Tuesday, September 9, 2014

Bass power!

I just wanted to say I LOVE the little bass booster I posted last time. It is marvellous!

Saturday, August 16, 2014

Headphone Bass Booster

This is what I've come with this time, the main electronic project this summer.


What we have here is a bass booster device for headphones. It amplifies a range of signals that you can choose with the potentiometer on top. Although you can also boost high frequencies with this, it is intended to amplify low ones which are which mobile phones and MP4 players lacks.

This is the thing out of the box. Each PCB deal with one channel.

The diagram is from somewhere in Makezine, but I modified it to suit my preferences and for improving it a little bit. Mainly, as I didn't want it to be portable, and I hate batteries, I fed it with a wall adapter. I don't want to go too deep into electronic matters, but for this you have to get some adapter rated with more voltage than what you need (I chose 9V), then regulate and filter at the same time with a LM7805 to avoid noises. I made some other changes too.

The thing is based on a LM386. The green wired PCB is right channel.

The result is great. I was worried because when you work with sound stuff you get annoying noises very easily, an as I'm sort of an audiophile, I can't listen to music with a noisy machine. It would have gone straight to the bin if that happened. But fortunately I get absolutely no noise from it!, just pure sound!

Besides it boosts a selected range of frequencies, it also amplifies noticeably the sound in general. Nevertheless, as it's not its purpose, I haven't measured what amount.

I added a nice yellow LED and fitted it into a box with a transparent cover.

I'm very happy with this little thing. I reckon it'll be very useful. For me, it's not about simply using this and there it is. I think the greatness comes when you set up properly an equalizer to manage all the frequencies, then with this extra boost in low ones you'll get a very nice sound.

Testing

I want to show it to you the best I can, so I've made a video where I play with the potentiometer. The audio (courtesy of Evanescence) is recorded through the computer so you can listen better. I promise it's not altered in any way, I've turned off all the equalizers.


Nice project.

Friday, August 15, 2014

Multilayer Printed Circuit Board

The other day I wanted to reuse some parts from a broken computer motherboard. I didn't want to try desoldering because I knew motherboards are multilayer PCBs, extremely difficult to solder or desolder on them. As I only wanted the audio ports, on the edge, I cut them. Easy.

After taking a look at my rubbish cutting work I though it would be perfect for showing you how multilayer PCBs are inside.

It is very difficult to find on the Internet (I haven't been able) clear pictures or simply some pictures like these ones, so enjoy.

Click to make them larger.

 You might think this particular board is thicker than others, but it's just an effect for this much zoom. It actually is 1.5 mm thick.

You can see those copper layers. There are at least 6 or 7! Mad.

Tuesday, July 15, 2014

Pedro's Power Supply

This has been one of my first summer electronic projects this year. As you know, finding a good project is difficult because it has to be cheap and it has to be useful, if not, it's a waste of time. This is a project that came to my mind long ago, but I recently checked the internet and there were lots of tutorials, so why not? 

I want to introduce you to:


This is my bench  ATX based power supply. As I recently realised, you never know how useful a bench power supply is until you get a bit into electronics. 

It's not difficult to notice but for who doesn't know, this is an old computer power supply, converted so you can use it as a bench power supply, which is the kind of power supply that is in, for example, electronic laboratories.

Note: from now I'll use 'PSU' (Power Supply Unit) instead of 'power supply'.

If you want to make something like this by yourself, check Google for 'bench power supply from computer'. I'm not recommending any website because, as I did, the best is spending a couple of days reading tutorials and then face your old PC PSU.

Now, let's talk about my machine. 

This is a quite old PSU. I had several ones to play but rather than right voltages, I looked for one that had no bad capacitors inside. Moreover it didn't have the 4 pin additional connector nowadays most motherboards needs, so I probably wouldn't use it again in a PC.

Actually, the voltages you can get are a bit lower that you can expect from an ATX PSU, as you can see in the stickers, but it's OK.


You can get 6 different outputs plus ground. I think you can use the chassis as ground at least when you deal with low currents so I add an screw (bottom left) for easy attaching stuff and crocodile clips. The switch is used for turning on the PSU from standby, or doing the opposite. The wire gauges are carefully calculated to withstand the max. current each output can produce. It's important taking care of this, because for example, +5 volts output can produce max 20 amps!, which is..., dangerous. I don't think today this old PSU can do that much, but I guess it can make 10 or 15 amps (in +5v output), and that is dangerous anyway.

Why did you put there a lamp, stupid idiot?!

The lamp is cool, but that's not the main reason. An ATX PSU is a 'switched PSU', you need to put a load always. If not, it can't work and it can keep output voltages constant. The recommend load in these cases seems to be some power resistors, but they have some disadvantages. They warm up to much, they are relatively expensive and if you plan to build this from chunk, they are really difficult to find even in machines that works with high voltages/currents like CRT monitors or another ATX PSU. 

Instead I decide to use a lamp. They are magnificent resistors and they looks cool in a machine (it looks like a valve). I used a household lamp because it doesn't light up, and it doesn't warm up. With a car lamp this will have happened because of much lower resistance. As you see I had to make some room by drilling a big hole.


The back switch is used to disconnect the PSU from the electricity or for activating standby output (+5 Standby).

Why didn't you do it variable, stupid imbecile?!

I wanted to do it variable from 0 to 12 volts, but I ended not doing it for two reasons. Firstly, I didn't have the right potentiometer nor the right IC, so I'd have had to order and to wait for them and I didn't want that (because I'm waiting for weeks the materials for my next project). Secondly, it would have been very hard to find room inside to place the regulator circuit.


Now it's time to use it, I need to feel I've done something useful!
Thanks for reading.

Thursday, July 3, 2014

PCBs afternoon

At first, I didn't plan to spend all the afternoon messing up with old electronics, but I found more work than I thought. There were some interesting stuff I want to show you.

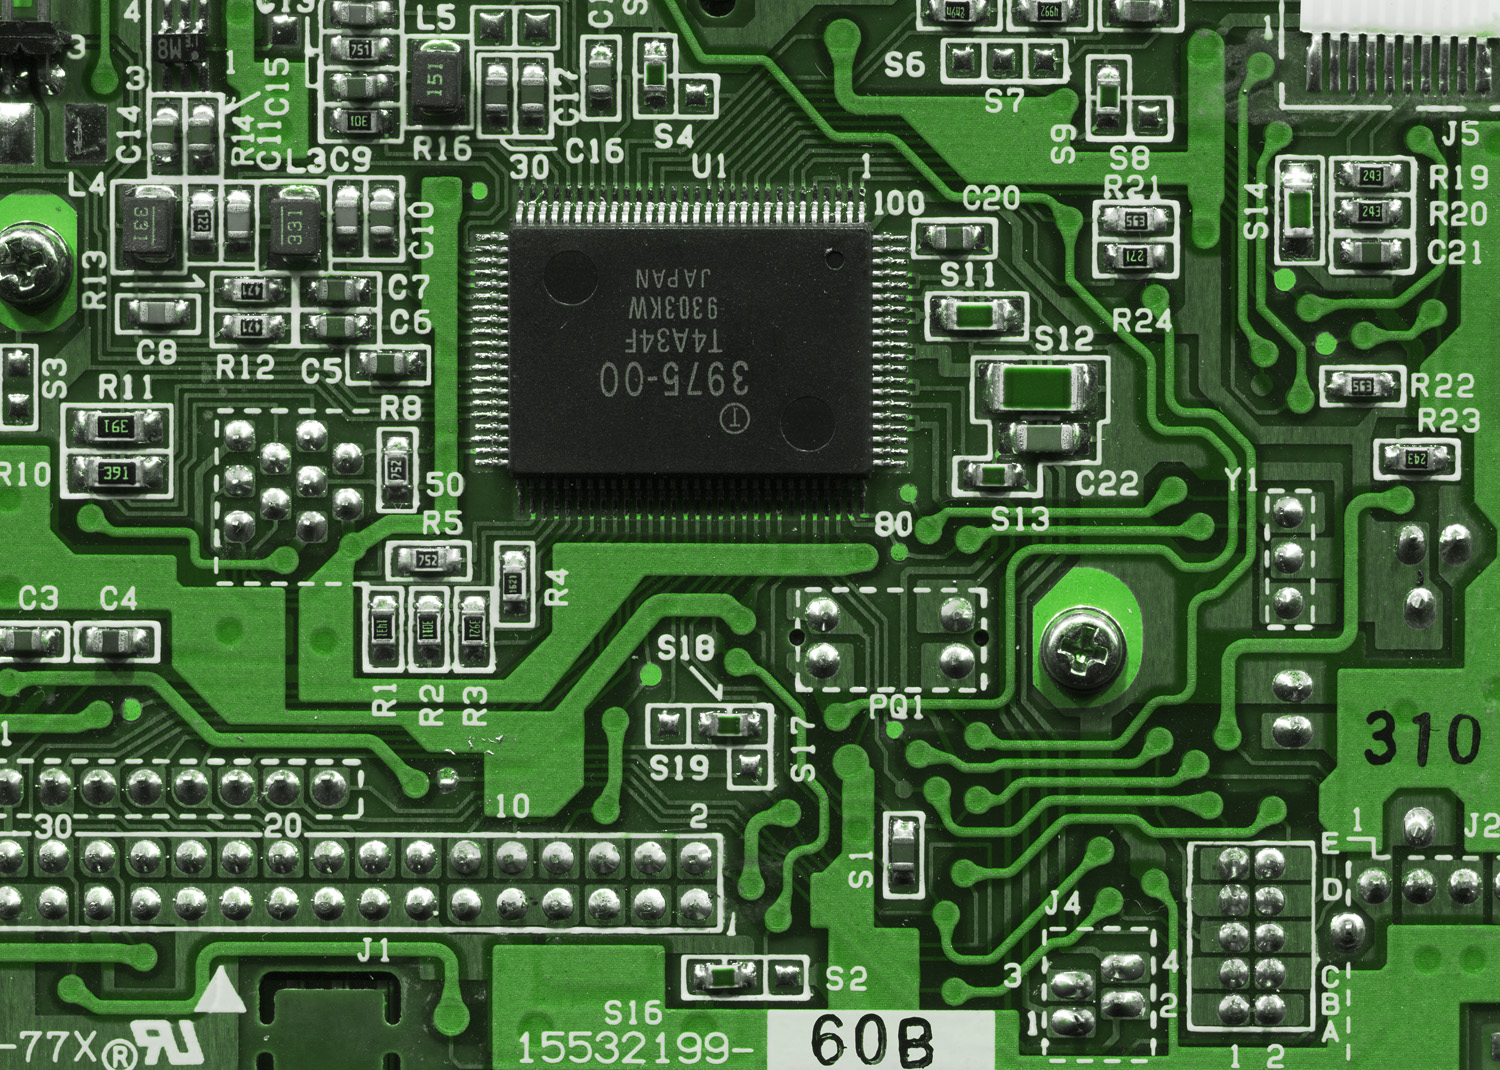
I started opening an old portable TV-Radio-Cassette player. Nothing interesting until I saw the PCB. As an example, this is how a typical PCB looks like (upside down):


The tracks are geometrically design and optimized by a computer. Now this is how mine looked like:


If you see the picture in full size, you'll realize of the tracks shapes. IT'S MAD!!! 
It wasn't the first time I faced one of those crazy boards, but I would say they are pretty uncommon, and I've never taken a picture of one.

Later, it was time for one of the first VHS players (I've been told the first one actually) that people of my place bought. Quite old stuff. The inside was very impressive:


To be honest, I got surprised. I really enjoyed that moment. I didn't hope this particular player was so complex! It had nothing to be with nowadays machines!

It took me hours to take it apart, but I found a lot of useful components like that big transformer (top left) with multiple outputs. As a curiosity, this piece (the player) is so old that there was NOT A SINGLE smd component in it! This is not even thinkable today. 

Monday, June 16, 2014

Mixcloud

It has been over a year since I started to get interested in electronic music. I began to listen to it, but later I wanted to try to make some stuff by myself, I love experimenting with music. It's boring and not fun when you start with no idea about how electronic music works, although it has of course similarities with other kinds of music, but you can't find them at the beginning. Let's say I had a lot of free time, and I started to get it.

Until the date of today I've made 4 songs, and I find it more enjoyable as I progress. I plan to put all the songs together in a home-made CD when I end up with some more, but, you know, time and quality aren't good friends, so it will take me a while.

The thing is that now that I see that this works, it's about time to get some place in the internet where showing the music. The motivation for that is, as I wrote on the biography, it takes me a lot of time and effort to make a song, although I do it just for fun, so what I'd like most is that people listen to it, and occasionally get some feedback.

So here is the site. Tomorrow there will be available the fourth and newer song.
Thanks for listening.


http://www.mixcloud.com/pffm12/

Wednesday, April 30, 2014

The importance of taking photographs

This afternoon I've had a chat with some English friends. They are a funny old couple who I know several years ago. They really love travelling, really. At one point of our long conversation, they have show me what I can call, a brief travel book. It was just a list with all the destinations they have visited in all their years, and that was crazy. Insane. I am not deep interested in travelling too much (at least not yet), but I have realised of the importance of taking pictures in these special situations. Because no person has enough memory to remember all the journeys or experiences along its life, and me, who have no memory at all, even less.

Something like shoot with the camera at the hotel room where you have slept, for example, will mean a lot.

I have always thought taking that kind of photos is silly, and that what really matters is live the moment, not worrying about cameras, but that's a mistake and I'm in time to fix it. It is comfortable not care about photographs, cameras,  places to get good pictures..., but I have found that it's worth the effort.

It's very important to take photographs (not in excess neither) of everything you find it relevant during a journey (large or quick trip), otherwise tomorrow you won't probably remember anything and there will be nothing left.

Friday, February 21, 2014

My wallpaper collection #2


http://imgur.com/7aCXHuB

Title: Audi S5 tuned
Dimensions: 1920x1080
Source: Web.
Comments: Edited and improved by me. (Medium-hard edited)

My wallpaper collection #1


http://imgur.com/ZTVVCXY

Title: Tony Stark's ARC reator.
Dimensions: 1024x768
Source: Web.
Comments: Edited and improved by me.